英文mv怎么拍摄视频教程
好,我现在要帮用户写一篇关于“英文MV怎么拍摄视频教程”的文章,我得理解用户的需求,他们可能是一个刚开始学习拍摄英文MV的人,或者是一个需要快速了解拍摄流程的人,文章需要详细且实用,涵盖从准备到拍摄的各个步骤。 要吸引人,同时明确主题,考虑到英文MV,标题可能需要包含关键词,Step-by-Step Guide”或者“Complete How-To Guide”,这样既符合关键词,又能让读者一目了然。
需要不少于926个字,所以要详细展开,我应该分步骤来写,这样结构清晰,读者容易跟随,可能的步骤包括前期准备、场景选择、拍摄技巧、后期制作等。
前期准备部分,我需要提到剧本和导演的重要性,因为这直接影响拍摄效果,然后是音乐的选择,因为英文MV的音乐需要与歌词内容相匹配,这样才能传达正确的信息,灯光和背景也是关键,好的灯光能突出主题,背景需要与品牌或主题相符。
拍摄阶段,需要详细描述每个环节,比如拍摄前的沟通,如何捕捉瞬间,以及如何处理突发情况,这些细节能让读者觉得实用。
后期制作部分,剪辑和音效处理是重点,特别是如何让英文MV看起来更专业,宣传推广也是不可忽视的部分,因为MV的成功离不开推广。
在写作过程中,我需要确保语言简洁明了,避免使用过于专业的术语,让读者容易理解,要提供具体的建议和实用的技巧,比如如何选择角度、如何处理光线等。
考虑到用户可能需要一些视觉上的指导,虽然不能提供图片,但可以通过文字描述让读者有更清晰的想象,描述镜头的运用、构图技巧等。
总结部分要强调坚持和细节的重要性,鼓励读者认真对待每一个环节,这样才能拍摄出高质量的英文MV。
我需要确保文章结构合理,内容全面,同时保持流畅和自然,可能还需要检查一下是否有遗漏的重要步骤,比如天气和环境的考虑,或者如何处理复杂的拍摄场景。
这篇文章要成为英文MV拍摄的实用指南,帮助读者从头到尾顺利完成拍摄过程,确保最终作品达到预期效果。
How to Shoot an English MV: A Step-by-Step Guide
Introduction
If you're planning to create an English music video (MV) that will captivate your audience and convey the essence of your brand or message, you're in the right place. This guide will walk you through every step of the process, from preparation to final touches, ensuring your MV is not only visually appealing but also engaging and effective. Whether you're a seasoned filmmaker or just starting out, this comprehensive tutorial will provide you with the tools you need to bring your vision to life.
Preparing for the Shoot
Before you dive into the creative process, it's essential to lay the groundwork. This step ensures that your vision is clear, and everyone involved is on the same page.
-
Script andStoryboard: Your script should be detailed, with clear scenes and shots. A storyboard will help visualize the flow of the video, making it easier to plan each scene. If you're collaborating with a director or writer, ensure everyone has a copy of the final version.
-
Music: The song you choose is crucial. It should align with the tone and message of your MV. Consider the tempo, key, and mood of the music, as it will influence the overall feel of the video. If you're unsure, seek feedback from the team to refine your choice.
-
Visual and Technical Requirements: Outline the visual style, color scheme, and tone of your MV. Decide on the equipment you'll use, such as cameras, lighting, and editing software. A list of props and costumes will help streamline the production.
-
Team Coordination: Gather your crew—director, cinematographer, lighting designer, sound technician, and makeup artist. Clear communication is key to avoid last-minute conflicts. Everyone should be familiar with their roles and the overall vision.
Choosing the Location
The setting of your MV can make or break its impact. A well-chosen location can enhance the story, while a poorly chosen one can detract from it. Consider the following when selecting your location:
-
Relevance to the Brand: If you're promoting a brand, choose a location that aligns with its image. For example, a fashion brand might benefit from a chic urban setting, while a tech brand could use a sleek, modern area.
-
Cultural Significance: If your MV is about a cultural event or theme, select a location that reflects that culture. This adds depth and authenticity to your video.
-
Weather and Time: Consider the weather conditions and the time of year. Sunny days are great for outdoor shoots, while indoor locations are ideal for cooler weather or winter shoots.
-
Logistics: Ensure the location is easily accessible and safe. Clear signage and proper parking are essential to avoid delays or accidents.
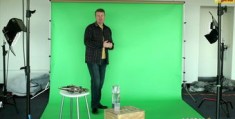
Lighting and Camera Setup
Proper lighting and camera placement are critical to capturing the right mood and detail in your video. Here's how to set this up:
-
Natural Light: Whenever possible, shoot in natural light as it provides a soft, natural glow. However, if natural light isn't available, use fill lights to create a bright and even environment.
-
Shadows and Highlights: Use shadows to add depth and dimension to your scenes. Highlights will draw attention to key subjects and create a dynamic effect.
-
Cinematography: The camera's position and angle can influence the viewer's perception of the scene. Experiment with different angles to convey the desired emotion—wide shots for a broad view, close-ups for detail, and medium shots for a balanced perspective.
-
Tripod and Stabilization: Use a sturdy tripod to prevent camera shake, especially during long takes. Video stabilizer can help reduce jitter and make your footage more professional.
Capturing the Action
The heart of the shoot is capturing the action. Here's how to ensure your video is engaging and captures the moment:
-
Timing the Action: Time your shots precisely to create a sense of rhythm and flow. A well-timed action can make the video more compelling.
-
Framing the Shot: Focus on framing your subject in a way that draws the viewer in. Use leading lines, symmetry, and composition techniques to guide the viewer's eye through the frame.
-
Handling the Audio: Ensure the audio is clear and in sync with the visuals. If you're recording dialogue, make sure it's delivered naturally and fits the context.
-
Revising on Location: Don't be afraid to make revisions on location. If something doesn't look right, adjust it immediately to maintain the creative vision.
Handling Incidents and Contingencies
Unexpected events can arise during production, so having a plan is essential.
-
Weather Incidents: If rain or other weather conditions interfere, use a棚 to protect your equipment. If shooting indoors, ensure it's dry and well-ventilated.
-
technical Issues: If your equipment malfunctions, have a backup plan. This could involve a spare camera, lighting, or other gear. Always carry a spare battery and ensure all equipment is in good working condition.
-
Contingency Planning: Have a plan for potential issues, such as camera malfunction, bad lighting, or wardrobe malfunctions. Having a backup plan can save time and prevent costly delays.
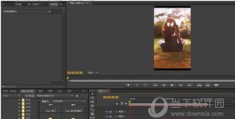
Post-Production and Editing
Once the shoot is complete, it's time to edit and refine your video.
-
Color Correction: Adjust the color levels to ensure your video looks its best. This includes correcting any overexposed or underexposed areas.
-
Trimming and Selecting Footage: Remove any unwanted clips and select the best shots to include in your video. Decide which scenes will convey the message and which can be omitted.
-
Adding Music and Effects: Ensure the music is in sync with your video. Add any necessary sound effects or transitions to enhance the overall experience.
-
Final Touches: Review your video for any inconsistencies in lighting, color, or sound. Make any final adjustments to ensure the video is polished and professional.
Marketing and Distribution
After the video is complete, it's time to promote and distribute it.
-
Online Presence: Upload your video to your website, social media platforms, and other online channels. Use SEO and keywords to ensure it's discoverable.
-
Social Media Campaigns: Share snippets of your video on social media to generate buzz. Encourage your audience to like, comment, and share your video.
-
Partnerships: Partner with influencers or bloggers in your niche to promote your video. They can provide exposure to a wider audience.
-
Physical Distribution: If applicable, prepare your video for physical distribution through platforms like Vimeo or other online platforms.
Conclusion
Creating an English music video is a challenging but rewarding process. By following this comprehensive guide, you can ensure that every aspect of your video is thought through and executed to the best of your ability. Remember, the key to a successful video is a clear vision, well-planned execution, and a commitment to excellence. With patience and attention to detail, you can create a video that resonates with your audience and achieves your marketing goals.